- A query can be saved and attached to other screens within GAINS, allowing the user to retrieve only those SKULs that meet the defined criteria within the query.
- The Query Builder can be used to create ad-hoc reports. Each user has access to a “User Queries” folder as well as “Public Queries” and “Group Queries.” Once a query has been designed and executed, the results are displayed in the Results View pane.
- Query results field values can be mass-updated in the Query Builder screen.
This section describes the purpose of each section of the Query Builder screen and provides instructions on building queries.

Save Query Screen
- Query Builder Screen Sections
- Query Results
- Criteria
- Set Sort Order
- SQL View
- Example Query
- SKUL List Creator
- Manually Type SKUL Entries
- Paste SKUL Entries
- Range Filter
- Execute a Static Query
Query Builder Screen Sections
The Query Builder screen has five main sections: the Results Field Selector pane, Results Pane, Criteria Field Selector pane, Criteria pane, and SQL View pane.
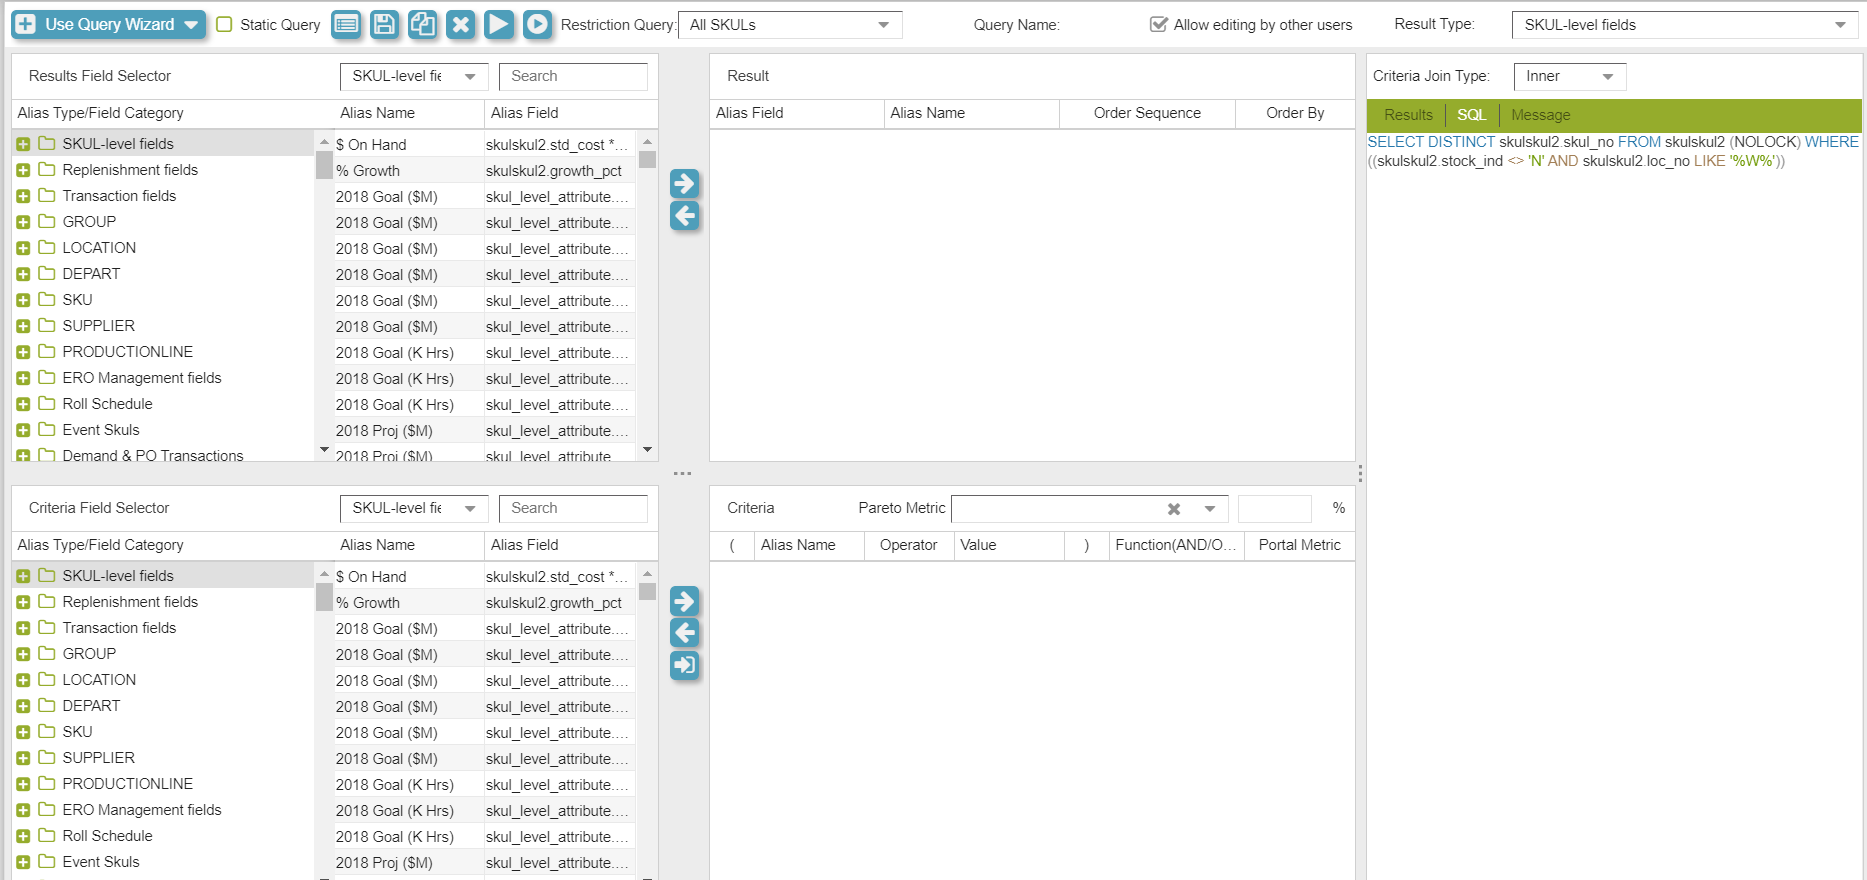
Query Builder Screen
Query Results
The Query Results pane is where users specify which fields will appear in the ad-hoc report generated by executing the query. Note: Only fields selected in this section will be available when defining the sorting of the query results. The "Results Field Selector" on the left side of the screen lists the available aliases that can be added to the query. These aliases are for a variety of types that can be selected from the "Results Type" drop-down button located in the upper-right hand corner of the screen.
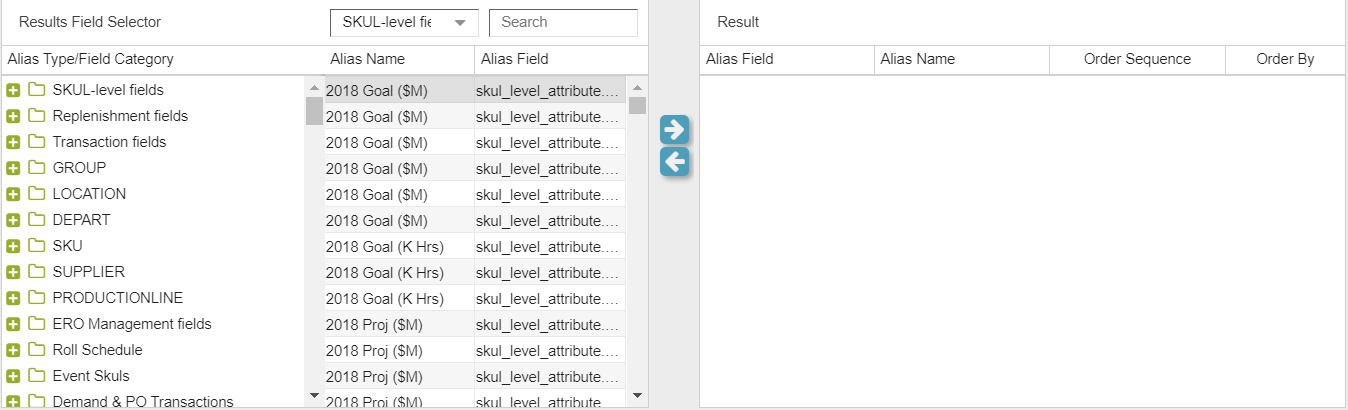
Results Display
For convenience, there are two alias views possible: Hierarchical view, which displays aliases organized in folders (according to the Alias Group the alias belongs to in the Alias Creator), or Flat view, which displays all the aliases together regardless of Alias Group and with the Alias Type also shown. Both views organize aliases alphabetically by alias name.

Hierarchical View

Flat View
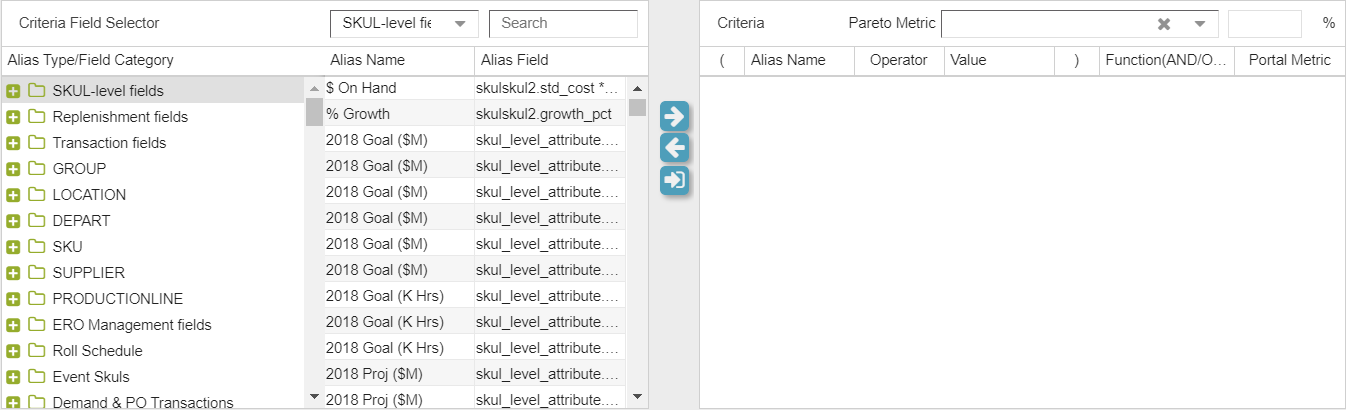
Criteria
The Criteria pane is used to define the subset of SKULs or replenishment records that will be retrieved by the query. The subset defined by the criteria is:
- Displayed in the Results View pane after the query has been executed; and
- Retrieved by any screen to which the saved query has been attached.
The “Criteria Field” column is another alias column, which functions in the same way as the “Fields” column described in the previous subsection. The selected alias is compared via the method selected in the “Operator” column (equal to, greater than, less than, etc.) to the “Values” column, which can be either another alias or a character/numerical value.
To compare an alias to a character or numerical value, simply double-click and type the value in the “Values” column. An example of this type of statement is “Action Code = 1.”
The user may choose to create as many criteria rows as necessary. The “And/Or” column defines how the criteria rows relate to each other. When using a mix of “And” and “Or” functions, the parentheses columns must be used to create a valid mathematical statement (e.g., keep “And” statements grouped together).
The final column, “Portal Metric,” may be checked to indicate that the query will be used in the Planner Portal, and the results that meet the checked criteria will be used as the count of records returned.
Criteria Display
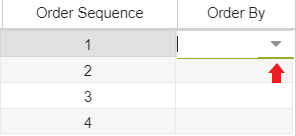
Set Sort Order
The results of the query can be sorted by any of the fields included in the Query Results pane at the top of the screen. Select ascending or descending from the “Order By” column by double clicking the cell and then clicking the drop-down arrow. The "Order Sequence" may also be changed by clicking and dragging individual Alias' to the desired location. Note that the ad-hoc report can also be sorted in the Results View pane after the query has been executed.
Set Order By Display
SQL View
The SQL View pane displays the exact code that will be executed against the GAINS database for the benefit of users familiar with SQL (Structured Query Language) syntax. This section is read-only.
Example Query
As a practical example to demonstrate how the Query Builder can be used, suppose a planner wants to see the forecasted growth percentage and total excess units for all inventory class ‘C’ SKULs with more than 10 units on hand. In this example, both of the aforementioned retrieval criteria must be met. The step-by-step instructions for creating this query are below, and the final result is displayed in the far right screen.
- Select the fields to display in the Query Results.
- Search for the "Item" Alias in the Results Field Selector and double click or highlight and click the arrow button
- Search for the "Location" Alias in the Results Field Selector and double click or highlight and click the arrow button
- Search for the "Excess Units" Alias in the Results Field Selector and double click or highlight and click the arrow button
- Search for the "Growth Percentage" Alias in the Results Field Selector and double click or highlight and click the arrow button
- Enter the Sort Order:
- In the “Order By” column of the Result Screen, select ASC or DESC
- Enter the Criteria:
- Search for the "Inventory Class" Alias in the Criteria Field Selector and double click or highlight and click the arrow button
- Search for the "On Hand" Alias in the Criteria Field Selector and double click or highlight and click the arrow button
- In the Inventory Class row, double-click in the “Values” column and enter 'C' or select in the drop down menu
- In the “And/Or” column, single-click and select AND.
- In the On Hand row, single-click in the “Operator” column and select > (greater than) or select in the drop down menu
- In the “Values” column, double-click and enter 10.
- Click the “Run Query” (Play Button) icon in the toolbar to execute the query

Query Results
SKUL List Creator
The SKUL List Creator in the Query Builder screen is a template that can be used to enter lists of item-location codes into GAINS. The purpose of this function is to enable the input of lists of SKULs, for example from a spreadsheet, for subsequent retrieval in GAINS. These lists of SKULs are referred to in GAINS as “static queries” because the results are not dependent on any data value characteristics of the SKUL. An example business scenario is if a supplier emails a list of items that are all going to be delayed, the list can be pasted into the SKUL List Creator and then attached to the Cross-SKUL Order Builder screen so that all impacted ARO dates may be modified.
There are multiple ways to enter data into the SKUL List Creator; typing the entries manually, pasting data from an external source (e.g. spreadsheet), and using the Dynamic Header to retrieve data. These methods can all be used for creating a SKUL list.
The steps to initiate a SKUL list is as follows:
- On the Query Builder screen, enable Static Query
- Search for the "Item" Alias in the Results Field Selector and double click or highlight and click the arrow button
- Search for the "Location" Alias in the Results Field Selector and double click or highlight and click the arrow button
- Click the plus button in the Static Query pane to add a SKUL

Enable Static Query
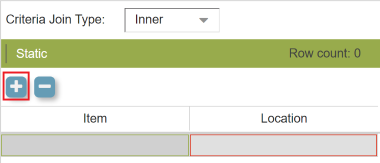
Add a SKUL
Manually Type SKUL Entries
To type the entries manually, double-click the grey box in the “Item” column and start typing the item code. Perform the same action for the location code in the “Location” column.
Note that the list of location codes is not pre-filtered for only current valid locations (because other SKULs may be added in the future). After clicking the “Save Query” icon in the toolbar, any invalid entries are highlighted in red frames.
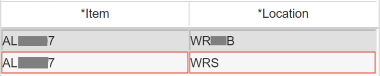
Invalid Entries
These SKUL List queries may also be saved as Public, Group, or User queries with the same security as described in the Query Creator screen.
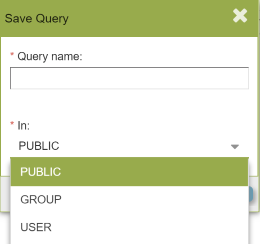
Save Query
Paste SKUL Entries
To paste a SKUL list, highlight and copy the required data from the source location. If the source location is a text document (email, MS Word, .txt, etc.) and it contains SKU and location codes, the columns must be separated by a tab for the SKUL List Creator screen to correctly identify the two columns. If the source location is a spreadsheet, the SKUL List Creator will identify the spreadsheet columns and separate the data accordingly, but the columns must be adjacent (no intervening columns, even if they are hidden) and the SKU code must be on the left.
After copying the required data, select the first cell and use the keyboard shortcut Ctrl+v to paste.
Finally, save the query by clicking the “Save Query” icon in the toolbar. Similar to the manual entry data, after clicking the “Save Query” icon, any invalid entries are highlighted in red frames.
Range Filter
Users have the option to filter SKULs by a range of values through the Range Filter without creating a query.
The Range Filter can be accessed on GAINS screens by clicking on the "Range Filter" icon in the toolbar on the screen. Users can select values for the fields in the drop-down menu or type the values manually. More fields can be added to the criteria by clicking on "Add Fields" in the filter component.

Range Filter
Execute a Static Query
To execute the saved SKUL List query against a GAINS screen, first open the screen to be retrieved in. Click on the "Attached Query" button on the toolbar. In the List of Existing Queries pop-up, expand the folders to find the saved query, and click on the "Attach Query" button.
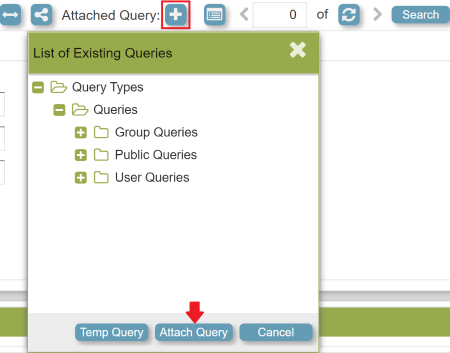
Attach Query
Queries with invalid entries will be saved, and only the valid SKULs will be returned during retrieval. Note that as new SKULs are added to GAINS and/or old SKULs are removed from the system, queries saved in the SKUL List Creator screen are not updated (i.e., no SKULs are added to or removed from the list).
Finally, during retrieval SKULs are returned in alpha-numeric order, regardless of the order saved in the SKUL List Creator static query.