There are four steps in the Mass Upload Template Guide:
- Step1 : Select Alias Type
- Step 2 : Select Keys
- Step 3 : Select Values
- Step 4 : Done
Step1 : Select Alias Type
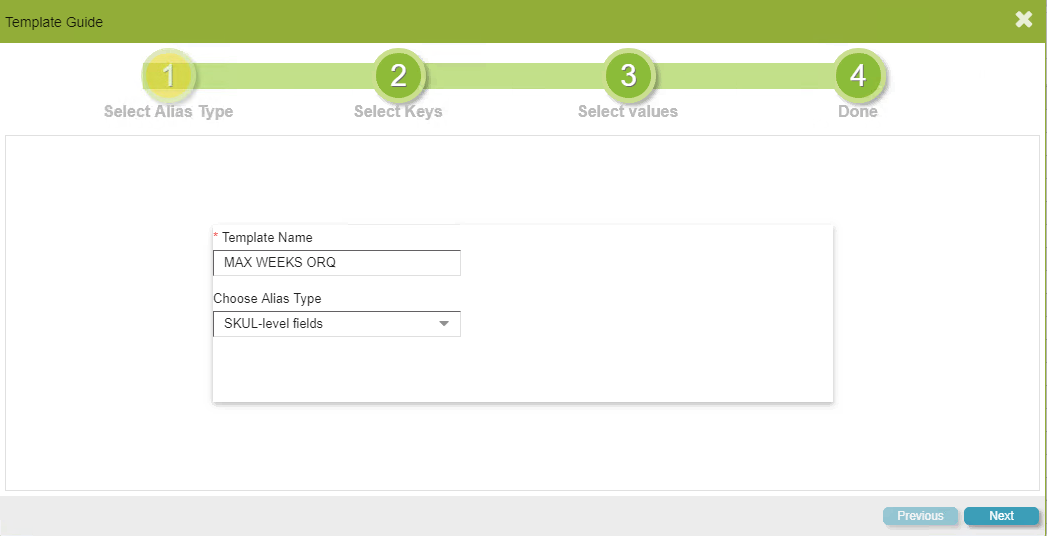
The first step of four involves naming your template and choosing its associated Alias Type. The template name is completely definable by the user. The Alias Type represents at which level data is represented within GAINS. The most common alias types are:
- SKUL-level fields
- Transaction fields
- Replenishment fields
Step 2 : Select Keys
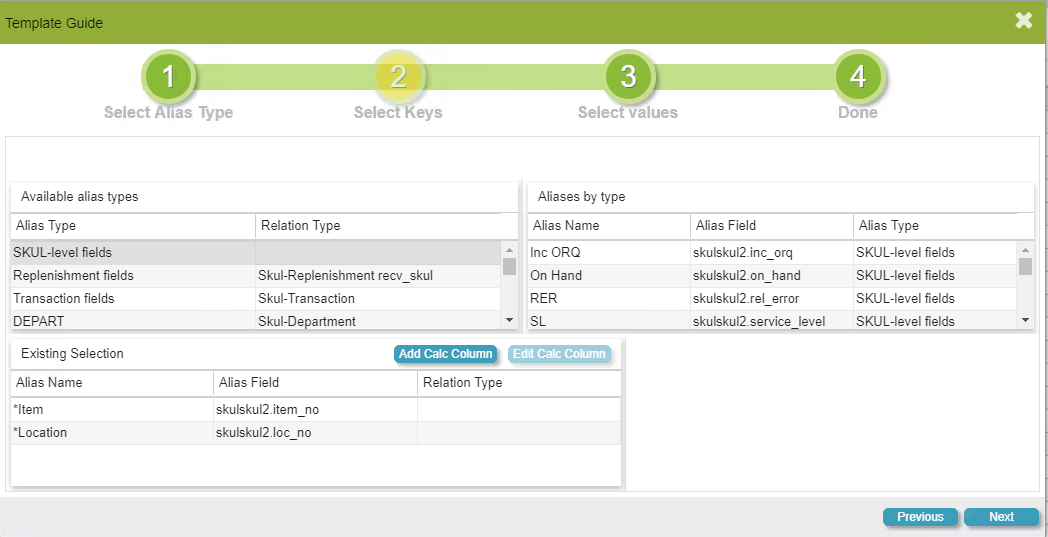
The second step of four identifies the primary keys in which the template will mass upload information off of. For example, the screenshot above represents an Item and Location combination level, meaning, that a user will be updating information within the GAINS database based off an item/location combination.
However, it is possible to mass upload information on a non-SKUL level (without modifying the Alias Type). For example, the screenshot below represents an Inventory Class level in which information can be updated by Inventory Class (rather than Item/Location).
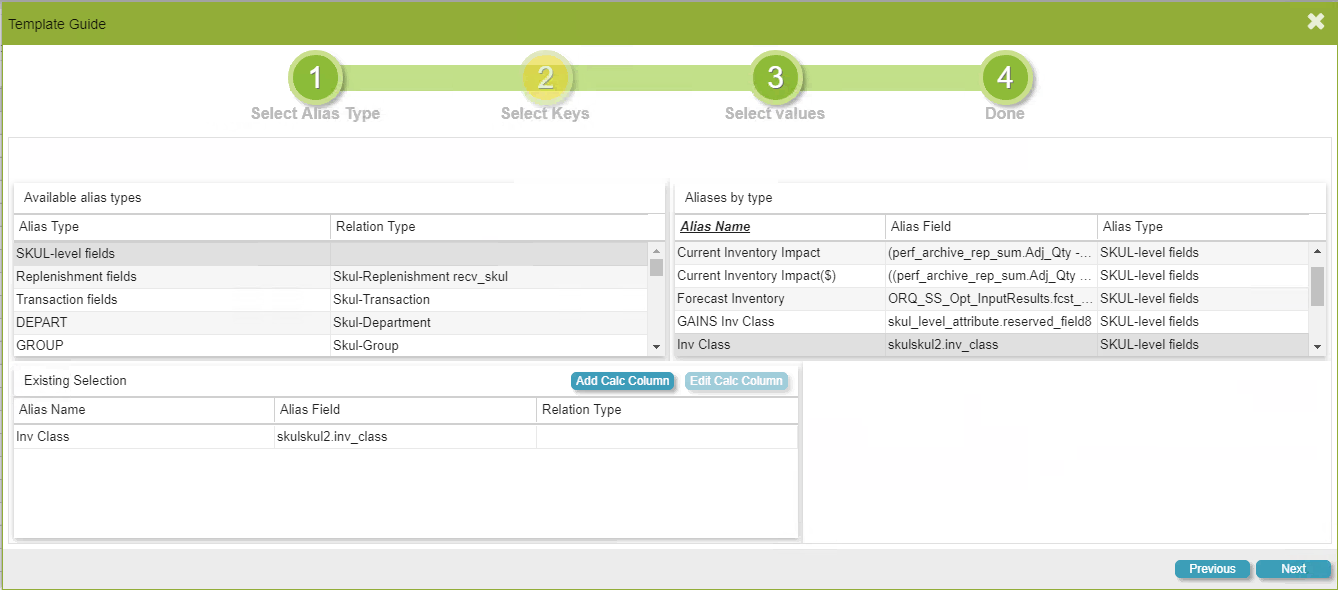
The purpose of this step is to eliminate the requirement of all mass uploads to be SKUL-level. Within V9, we can now support mass uploads of information at different levels.
Step 3 : Select Values
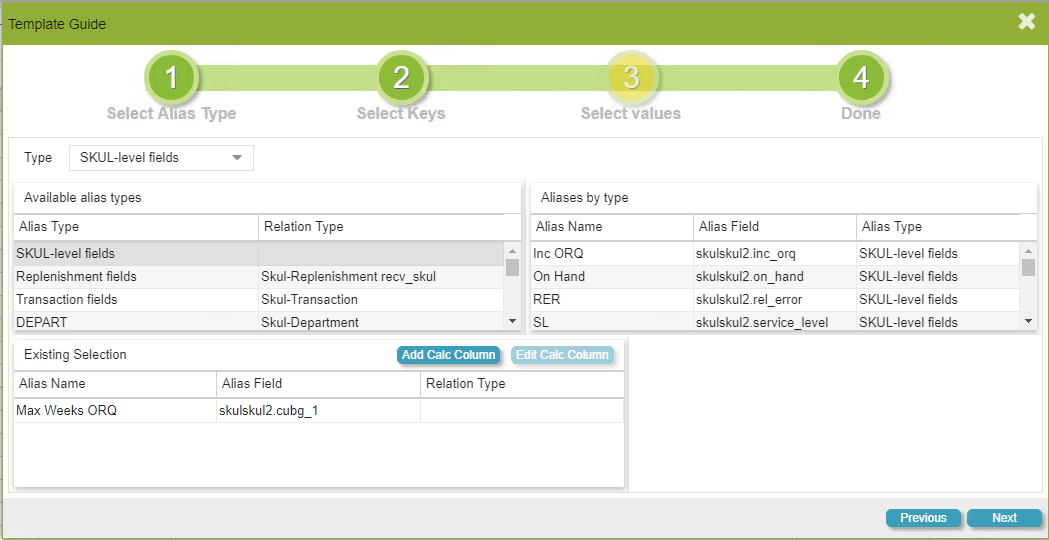
The third step of four identifies the alias/field in which you would like to update. This field should not be included in Step 2.
Step 4 : Done
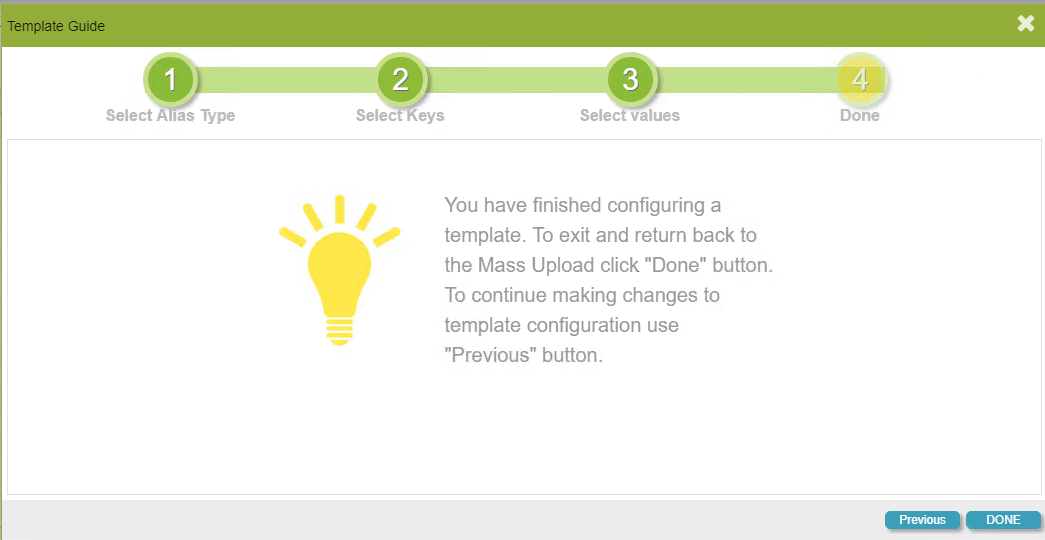
After completing all three initial steps, you have successfully created a template for use in the Mass Upload screen.
Using our first example, this is what the template will look like:

This template is an Item/Location combination level and the Max Weeks ORQ will be updated based on an Item/Location specification.
Using our second example, this is what the template will look like:

This template is an Inventory Class level and the Minimum Service Level will be updated based on an Inventory Class specification.